
You might not realize that clogged air filters can significantly reduce your HVAC system’s efficiency, leading to poor indoor air quality. When you neglect routine troubleshooting, issues like refrigerant leaks and thermostat malfunctions often go unnoticed, compromising your home’s air. Understanding how to inspect ductwork, clean coils, and monitor humidity levels can prevent these problems and boost your system’s performance. But how exactly do you identify unusual noises or determine when to call in a professional? Let’s explore the critical steps for effective HVAC troubleshooting and maintenance.
Common HVAC Issues
When troubleshooting HVAC systems, you’ll often encounter common issues like refrigerant leaks, thermostat malfunctions, and clogged filters. To effectively address these problems, you need a systematic approach and attention to detail.
First, refrigerant leaks can severely impact system efficiency. You’ll need to use a refrigerant leak detector to pinpoint the source of the leak. Once located, repair or replace the affected components and recharge the system with the appropriate amount of refrigerant. Always verify the system is properly sealed to prevent future leaks.
Another frequent issue is thermostat malfunctions. Start by checking the thermostat’s settings and batteries. Inspect the wiring connections to see if the settings are correct and the batteries are good. Loose or corroded wires can cause erratic system behavior. In some cases, you might need to replace the thermostat entirely.
Lastly, while clogged filters will be discussed in detail later, remember they can restrict airflow and reduce system efficiency. Regularly inspect and replace filters to maintain peak performance.
Inspecting Air Filters
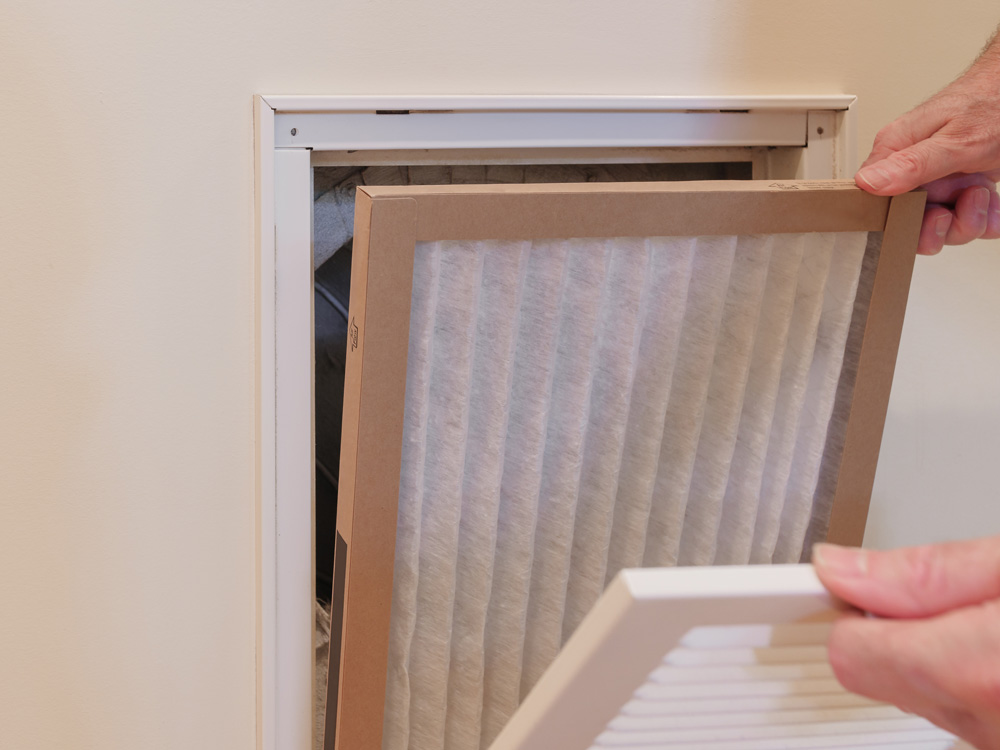
Regularly inspecting air filters is essential to guarantee your HVAC system operates efficiently and effectively. Start by turning off the HVAC unit to ensure safety. Locate the filter compartment, usually near the air handler or return duct. Carefully remove the filter and examine it under good lighting. Look for visible dirt, dust, or debris clogging the filter media. If the filter appears gray or black, it’s time for a replacement.
Check the filter’s MERV rating to verify it matches your system’s requirements. Higher MERV ratings capture smaller particles but might reduce airflow if your system isn’t designed for them. Verify that the filter fits snugly within the compartment to avoid air bypass, which reduces filtration efficiency.
For reusable filters, follow the manufacturer’s cleaning instructions. Typically, this involves rinsing with water and allowing it to dry completely before reinserting. While inspecting, note any unusual odors indicating mold or other contaminants.
Monthly filter checks are essential, especially during peak usage seasons. Maintaining clean air filters will enhance air quality and extend your HVAC system’s lifespan, ensuring it serves others effectively and without interruption.
Checking Thermostat Settings
Verifying your accurate thermostat settings is crucial for maintaining ideal performance and energy efficiency in your HVAC system. Start by confirming that the thermostat is set to the correct mode—heating or cooling, depending on the season. The temperature setting aligns with comfort preferences and energy-saving guidelines, typically around 68-72°F in winter and 75-78°F in summer.
Next, check the scheduling program to see if your thermostat has one. Incorrect schedules can cause unnecessary energy consumption and discomfort. Set the thermostat to adjust temperatures based on occupancy patterns, ramping up or down when the home is empty or during sleep hours.
Inspect the thermostat’s location. It should be installed away from direct sunlight, drafts, doorways, and windows, which can cause false readings and inefficient operation. If necessary, relocate the device to a more central, stable environment.
Examining Ductwork
Inspecting your ductwork for leaks, blockages, and damage is crucial for maintaining ideal airflow and efficiency in your HVAC system. Start by visually examining all accessible ductwork. Look for any signs of wear, such as holes, disconnected segments, or crushed sections. Use a flashlight to inspect less accessible areas, guaranteeing you don’t miss hidden issues.
Next, turn on your HVAC system and observe airflow at each vent. Inconsistent airflow can indicate blockages or leaks. To detect leaks, use a smoke pencil or incense stick near duct connections; smoke drifting away from the ductwork suggests an air leak.
Seal minor leaks with mastic sealant or aluminum foil tape. For extensive damage or inaccessible areas, consider professional help. Regular maintenance guarantees your HVAC system runs efficiently, reducing energy costs and improving indoor air quality.
Cleaning Coils
Cleaning your HVAC system’s coils is essential for maintaining peak efficiency and preventing unnecessary wear and tear. Over time, dirt and debris can accumulate on the evaporator and condenser coils, reducing their ability to absorb and dissipate heat. This buildup forces your system to work harder, increasing energy consumption and the risk of breakdowns.
Start by turning off the power to your HVAC unit to guarantee safety. Remove the access panel to access the evaporator coils inside the air handler. Use a soft brush to gently dislodge any dirt, then apply a no-rinse coil cleaner. This solution will foam up, capturing the grime before dripping off. Be meticulous but gentle to avoid damaging the delicate fins.
For the condenser coils, typically found outside, clear any surrounding debris like leaves or grass. Use a coil cleaner designed explicitly for outdoor units. Spray it thoroughly, let it sit per the manufacturer’s instructions, then rinse it off with a garden hose. Avoid using a pressure washer, which can bend the fins and reduce efficiency.
Regularly cleaning your coils enhances air quality and extends the lifespan of your HVAC system, ultimately improving household service.
Monitoring Humidity Levels
How can you guarantee your HVAC system maintains ideal indoor humidity levels? Start by investing in a reliable hygrometer. Place it in a central location and regularly check humidity readings. Aim for a humidity level between 30% and 50%. If levels fall outside this range, your indoor air quality could suffer.
Next, confirm your HVAC system includes both humidification and dehumidification capabilities. Inspect and clean the humidifier and dehumidifier components routinely. Dust and mineral deposits can hinder their performance. Replace filters as the manufacturer recommends to prevent clogging and maintain efficient operation.
Another vital step is to check for leaks or standing water around your HVAC unit. Excess moisture can elevate humidity levels. Address these issues promptly to prevent mold growth and maintain ideal air quality.
Consider integrating a smart thermostat with humidity control features. This allows you to set and monitor humidity levels remotely, confirming a consistent and comfortable environment for those you serve.
Identifying Unusual Noises
When your HVAC system starts producing unusual noises, it often signals underlying issues that require immediate attention. First, identify the type of noise. A banging or clanking sound typically points to loose or broken components within the blower assembly or motor. If you hear a hissing noise, there might be a refrigerant leak, drastically affecting the system’s efficiency and indoor air quality.
Next, a screeching or squealing sound indicates a problem with the belt or motor bearings. These components can wear out over time, leading to potential breakdowns if not promptly addressed. Rattling noises often suggest debris in the system or loose ductwork, compromising airflow and overall system performance.
To solve these issues, turn off the HVAC system and inspect the accessible parts. Look for visible signs of wear or damage, such as frayed belts or loose screws. Tighten any loose components and clear out any debris. If the noise persists, replacing certain parts or calling a professional for further diagnosis might be necessary.
Professional Maintenance Tips
To guarantee your HVAC system runs efficiently year-round, schedule regular professional maintenance to catch and address potential issues early. A certified technician can clean and inspect your system, confirming optimal performance and longevity. They’ll check refrigerant levels, inspect and tighten electrical connections, clean coils, and replace worn-out components.
Don’t overlook the filter. Depending on usage and filter type, it should be replaced every one to three months. A clogged filter restricts airflow, making the system work harder and reducing indoor air quality.
Pay attention to the ductwork. Leaky ducts can lead to energy loss and inconsistent temperatures. A professional can seal these leaks and confirm efficient air distribution throughout your home.
Another essential aspect is thermostat calibration. An inaccurate thermostat can cause the system to run too long or not long enough, affecting comfort and energy bills.
Lastly, ask your technician about the condition of the blower motor and belts. A worn-out blower motor can hinder airflow, while damaged belts can lead to system failure. Regular professional maintenance confirms your HVAC system serves others effectively, providing comfortable and healthy indoor air quality.
Conclusion
So, you’ve tackled common HVAC issues, inspected filters, checked thermostats, and examined ductwork. You’re already ahead of the game by cleaning coils, monitoring humidity, and identifying unusual noises. Remember, regular professional maintenance isn’t just a good idea—it’s essential. Think of it as a “tune-up” for your HVAC system. Stick to these best practices, and you’ll optimize your system, boost air quality, and extend your equipment’s life. Keep up the excellent work!