

If you’re facing a leak in your tankless water heater in East Dundee, IL, it’s vital to act quickly to prevent further damage. Knowing the right steps can make the repair process smoother and more effective. From identifying the source of the leak to testing the system after repairs, each step is fundamental. Let’s explore the steps you must take to address this issue efficiently.
Identify the Source of the Leak
When you notice a leak in your tankless water heater, it’s crucial to identify the source quickly to prevent further damage.
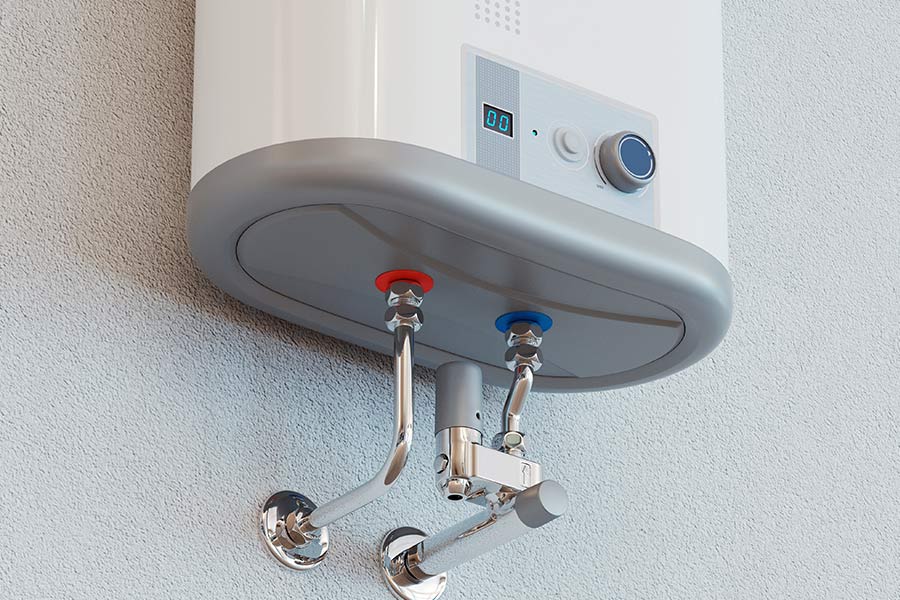
Start by inspecting the unit thoroughly. Check the connections, especially around the inlet and outlet pipes, as these are common culprits. Look for signs of corrosion or wear on the fittings, which can indicate a problem.
Next, examine the pressure relief valve; if it’s faulty, it could cause leaks. Don’t forget to inspect the heat exchanger for cracks or damage, as this can also lead to water escaping.
If your heater is mounted on a wall, check for any signs of water pooling underneath. You want to make sure you pinpoint the exact location of the leak before taking any further action. Additionally, consider contacting professionals for expert tankless water heater repair, as they can provide innovative solutions to address the issue effectively.
Turn Off the Power and Water Supply
Before you start any repairs on your tankless water heater, make certain to turn off the power and water supply to the unit. This step is essential for your safety and helps prevent further damage.
Locate the circuit breaker for your water heater and flip it to the off position. If your unit runs on gas, turn off the gas supply as well.
Next, find the main water shut-off valve, usually located near the water heater. Turn it clockwise to stop the flow of water.
Once both the power and water supply are off, you can proceed with the repairs without worrying about electric shocks or leaks causing more issues. Additionally, remember that tankless water heaters provide endless hot water on demand, which emphasizes the importance of ensuring proper functionality after repairs.
Taking these precautions guarantees a safer repair environment, allowing you to focus on fixing the leak effectively.
Once everything is secure, you’ll be ready to tackle the next steps in the repair process.
Inspect the Inlet and Outlet Connections
Inspecting your tankless water heater’s inlet and outlet connections is essential for identifying leaks. Start by visually examining both connections for any signs of water pooling or corrosion. These areas are common culprits for leaks, so be thorough.
If you spot any moisture, you may need to tighten the connections with a wrench, but be careful not to overtighten, as this might damage the fittings.
Next, check the condition of the rubber gaskets or seals. If they’re worn or damaged, it’s time to replace them. Make sure to turn off the water supply before replacing any parts.
After adjusting, turn the water back on and monitor the connections for any signs of leaking. Regularly inspecting these connections can help prevent future issues and extend the life of your tankless water heater. Additionally, engaging in routine check-ups can catch minor issues before they escalate, ensuring optimal performance. If you’re unsure, don’t hesitate to contact a professional for assistance.
Check the Pressure Relief Valve
Next, you should check the pressure relief valve on your tankless water heater. This valve plays a vital role in releasing excess pressure, so ensure it functions properly and the pressure settings are correct. If you find any issues, addressing them quickly can prevent further leaks and damage. Regular maintenance from experienced technicians can also help ensure your water heater operates efficiently.
Valve Functionality Assessment
To guarantee your tankless water heater operates efficiently, checking the pressure relief valve is essential. This valve helps prevent excess pressure buildup, which can lead to leaks or even damage.
Start by locating the valve on your unit; it’s usually near the top. Gently lift the lever to see if water flows out. If it does, that’s a good sign, but if nothing comes out or it drips continuously, you may have a faulty valve.
Make certain the valve isn’t clogged with debris, as this can affect functionality. If you find any issues, it’s best to replace the valve to ascertain safe operation.
Don’t skip this step—keeping your system in check will save you time and money down the road.
Pressure Settings Verification
After evaluating the functionality of the pressure relief valve, it’s important to verify the pressure settings of your tankless water heater.
Proper pressure guarantees efficient operation and prevents leaks. Follow these steps to check the pressure settings:
- Locate the pressure gauge: Find the gauge on the unit or near the inlet/outlet pipes.
- Check the pressure reading: Confirm the pressure is within the manufacturer’s recommended range, typically between 30-80 psi.
- Adjust if necessary: If the pressure is too high, adjust the regulator or consult a professional if you’re unsure.
Examine the Heat Exchanger
While inspecting a tankless water heater leak, examining the heat exchanger is essential, as it often plays a key role in the unit’s performance.
Start by turning off the power and water supply to the heater to guarantee your safety. Next, check for any visible signs of leaks or corrosion on the heat exchanger itself. Pay close attention to the connections and seals, as these are common failure points. If you notice any cracks or significant wear, it might be time to replace the heat exchanger.
Additionally, consider flushing the heat exchanger to remove any built-up sediment or mineral deposits, which can hinder efficiency and lead to leaks. This process can improve performance and extend the lifespan of your unit.
If you’re unsure about the condition of the heat exchanger or how to proceed, don’t hesitate to call a qualified technician for assistance.
Look for Corroded or Damaged Pipes
Corroded or damaged pipes can be a significant source of leaks in your tankless water heater system. Identifying these issues early can save you time and money.
Start by inspecting your pipes for any signs of corrosion, such as rust, discoloration, or flaking. Here are some critical things to look for:
- Visible Corrosion: Check for any rust or deterioration on the surface of the pipes.
- Water Stains: Look for water stains or puddles around the pipes, indicating potential leaks.
- Unusual Sounds: Listen for any hissing or dripping noises that could signal a leak.
If you notice any of these signs, addressing the issue promptly is crucial. Ignoring corroded or damaged pipes could lead to more severe problems and costly repairs down the line.
Always consider consulting a professional if you’re unsure about the condition of your plumbing.
Tighten Loose Fittings and Connections
One of the simplest yet most effective ways to address a leak in your tankless water heater is by tightening loose fittings and connections.
Start by inspecting all visible connections, including the inlet and outlet pipes. Use a wrench to tighten loose fittings gently—be careful not to overtighten, as this could damage the threads.
Next, check the connections for the cold and hot water supply lines, as well as the gas line if applicable. If you notice any stubborn leaks after tightening, it might indicate a need for replacement parts.
After making adjustments, turn the water supply back on and monitor the area for any signs of continued leakage. This step can save you time and money, ensuring that your tankless water heater operates efficiently.
If the problem persists, you may want to consult a professional for further assistance.
Replace Faulty Components
If you notice persistent leaks after tightening connections, it’s time to replace faulty components.
Start by identifying any damaged parts, like valves or gaskets, that may be causing the issue.
Once you’ve pinpointed the problem, you can install new components to restore your tankless water heater’s efficiency.
Identify Faulty Parts
Knowing how to identify faulty parts is essential for effective resolution when repairing a tankless water heater leak.
Start by examining the unit closely to pinpoint the source of the leak. Common culprits often include:
- Inlet/Outlet Connections: Check for loose or damaged fittings that may cause water to seep.
- Heat Exchanger: Look for cracks or corrosion in the heat exchanger, which can lead to leaks.
- Pressure Relief Valve: Inspect this valve; if it’s malfunctioning, it could release water unexpectedly.
Install New Components
After pinpointing the faulty components of your tankless water heater, it’s time to replace them to restore peak performance.
Start by gathering the necessary replacement parts, verifying they’re compatible with your specific model. Turn off the power and water supply to avoid any accidents.
Carefully remove the damaged components, taking note of how they were installed for reference. When installing the new parts, double-check connections and verify they’re secure.
Pay special attention to seals and gaskets to prevent future leaks. Once everything’s in place, turn the water and power back on, and test your heater for proper function.
If you’re unsure or uncomfortable with any step, don’t hesitate to call WeatherWise Heating & Cooling for professional assistance.
Test the System for Leaks
Begin by visualizing your tankless water heater’s system as you prepare to test it for leaks. This vital step guarantees that your repairs are effective and your system operates efficiently.
Here’s how to systematically check for leaks:
- Inspect Connections: Start by examining all water and gas connections. Look for any signs of moisture or corrosion that could indicate a leak.
- Check for Water Flow: Turn on the hot water tap in your home and observe the tankless water heater. If you notice any dripping or pooling water around the unit, that’s a sign of a leak.
- Use a Soap Solution: Mix a solution of soap and water and apply it to the connections. If bubbles form, they indicate escaping gas or water.
Schedule Regular Maintenance for Prevention
Identifying leaks is just one part of maintaining your tankless water heater effectively. To guarantee your unit operates smoothly and prevent leaks from occurring, scheduling regular maintenance is essential.
By having a professional inspect and service your water heater at least once a year, you can catch potential issues before they escalate.
During these maintenance visits, WeatherWise Heating & Cooling technicians will clean the system, check for signs of wear, and confirm that all components function properly.
This proactive approach not only extends the life of your heater but also enhances energy efficiency, saving you money in the long run.
Plus, regular maintenance gives you peace of mind, knowing your tankless water heater is less likely to develop leaks.
Conclusion
By following these steps, you can effectively tackle a leak in your tankless water heater. Did you know that about 30% of homeowners experience water heater issues at some point? Regular maintenance can help you avoid these problems and extend the life of your system. If you find the repairs too complex, don’t hesitate to reach out to a professional. Staying proactive about your water heater can save you time, money, and headaches down the road!